Record or livestream your lecture
It is possible to record your lecture on campus, or present through a livestream, using Mediasite recorder equipment. Make a reservation for one of the lecture halls equipped with a Mediasite recorder by contacting the scheduling office of the respective faculty.
Furthermore, we also offer several options for recording your lectures off-campus. Navigate the toggles below for more information.
Schedule your recording
It is preferable to schedule your recording in advance. Inform your Mediasite key-user (contact details at the end of this page) so they can schedule the recording and add metadata. In most cases you will have to push the recording buttons on the AMX display (touch panel) yourself to start and stop the recording.
You will have the option to request a livestream. In that case, your weblink to the livestream will be sent to you in advance. Livestreams have to be scheduled in advance!
If you forgot to schedule the recording and know how to operate the Mediasite recorder, you can start/stop the recording yourself. The recording will automatically be saved to the Mediasite recorder. Afterwards, you need to inform/ask your key user to retrieve and publish the recording to Mediasite and send you the weblink.
More information:
Rooms with Mediasite recorder equipment @ UM
FACULTY | CONTACT | ROOM |
LAW | ruimtereservering@maastrichtuniversity.nl | Feestzaal – BOU3 |
Statenzaal – BOU3 | ||
FASOS | fasos-planning@maastrichtuniversity.nl | Turnzaal – GG90-92 |
FPN / FHML | ruimtesrandwyck@maastrichtuniversity.nl | Maastrichtzaal – UNS 40 |
Bonte zaal – UNS 50, H1.331 | ||
Blauwe zaal – UNS 50, 0402 | ||
Groene zaal – UNS 50, 0406 | ||
Paarse zaal – UNS 50, 1319 | ||
Rode zaal – UNS 50, 0480 | ||
Heerlenzaal – UNS 40 | ||
Akenzaal – UNS 40 | ||
Luikzaal – UNS 40 | ||
Tongerenzaal – UNS 40 | ||
0126 – DEB1 | ||
0122 – DEB1 | ||
M009 – UNS 60 | ||
FPN | fdp-planning@maastrichtuniversity.nl | Jo Ritzen zaal (Auditorium) – Oxfordlaan 55 |
2 mobile recorders for use within FPN | ||
SBE | roombooking form | Lecture Hall – T53, A-1.01 |
Auditorium/Aula – T53 H0.01 | ||
F0019 – Tapijn | ||
F0014 – Tapijn | ||
1 mobile recorder for use within SBE |
Record your lecture off-campus
If you want to record your lecture off campus, you can use recording tools such as ZOOM and PowerPoint; Mac users also have KeyNote. Or you can use the DIY Video Studio at the Inner City Library to record your lecture.
After recording, use MyMediasite to upload to UM video platform Mediasite. Read how in the Upload your video with MyMediasite section.
Note: lecture recording tool Mediasite Mosaic (Mediasite Desktop Recorder) for UM staff is no longer available from 18-7-2022. Please use one of the other options mentioned above.
Upload your video with MyMediasite
The MyMediasite portal allows all UM staff members and students to upload and publish their educational videos in many formats. Videos in Mediasite are called presentations, because they can consist of different types of media.
It is possible to have multiple video inputs and PowerPoint slides in one presentation. The user can switch between the different feeds during playback.
How to upload a video file - For staff
Follow the steps below (or watch this video) to create your presentation/upload your video file. If you would like more support on how to do this, visit the Mediasite Instruction Portal for courses on uploading and sharing your videos with MyMediasite.
STEP 1
Login to the MyMediasite Management Portal and click on the + Add Media button in your right hand corner.
STEP 2
Click on Browse files and navigate to the folder with the media file you want to upload and select it (preferred format: *.mp4).
STEP 3
Enter a name and use the description field to indicate the corresponding course-code (if applicable), for example: 2022-003-MTH491 (YEAR-PERIOD-CODE). When choosing a destination, change the bullet from My drafts to the bullet beneath and click Change.
STEP 4
Change the Destination type from User Channel to Shared Folder and navigate to the folder where you want to create a presentation. Depending on your faculty, you will see different folder options. These folder options determine which users can view the presentation.
- LOCAL UM: The presentation will be viewable for all UM students and staff. Login is required.
- LOCAL FACULTY: The presentation will only be viewable for your faculty’s students. Login is required.
- WWW: The presentation will be viewable worldwide. No login is required.
STEP 5
Select Create Presentation by clicking on it. If you do not select a folder, the presentation will be created in your My Drafts user folder. You can always change this later.
STEP 6
During video upload, an indicator keeps you informed about the status: Queued for processing / Currently working. Please note: it may take several minutes for a file to be processed. You receive an email notification when processing is completed.
STEP 7
Once processed, a video (“presentation”) is automatically set to “Private”: only visible for you.
You can change the video’s visibility to “Public” by clicking on the Edit button on the right of the screen and changing the setting in the top right corner of the pop-up. Under the tab Player you can set a variety of additional features for the video, like Polls, and change the header of the player. Don’t forget to click Save when you are done.
How to upload a video file - For students
Follow the steps below to upload your video to MyMediasite
Share your videos from MyMediasite
To share a link to a presentation (video), you need to go to a presentation’s Share page. You can embed the video in an online page by copying the embed code, or you can email the link to a video using Mediasite system emails.
How to share a video from MyMediasite
Follow the steps below to share your video from MyMediasite with others or the web
How to share a Mediasite video in Canvas - For staff
Once a video is uploaded to and published in Mediasite, you can connect it to your Canvas course and share it with your students. A connection has been made for you to be able to use Mediasite videos in Canvas.
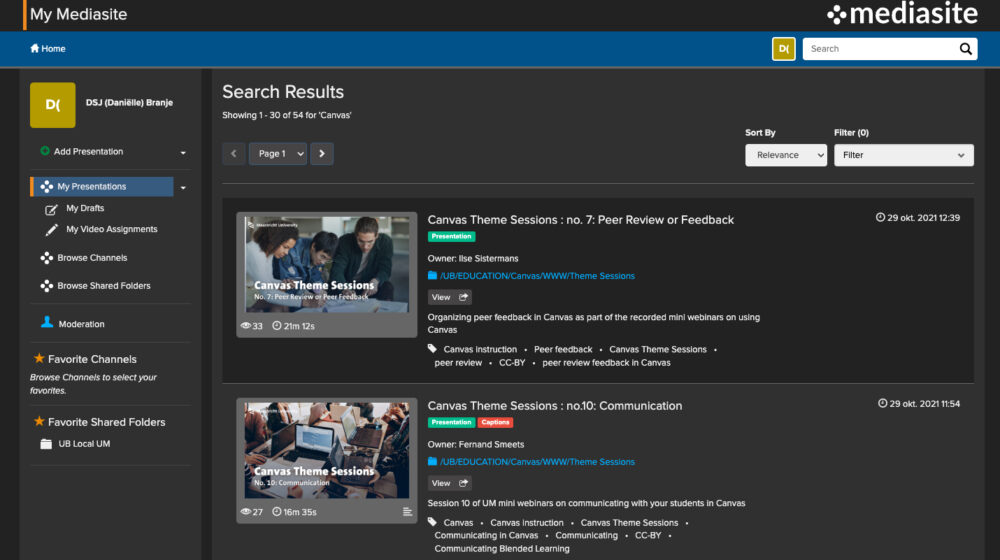
Watch this recorded Canvas Theme session on using (Mediasite) videos in Canvas.
You may also go to this Canvas instruction page for more information on linking Mediasite videos to Canvas
As UM teaching staff, you may log onto the self-paced online Maastricht University Canvas Training module on Mediasite Video for further instructions.
How to share a Mediasite video in Canvas - For students
MyMediasite for students is a new feature. Instructions will be added soon.
Create Mediasite Video Assignments in Canvas
In addition to viewing Mediasite videos in the Canvas course, an instructor can create video-based assignments. These video assignments require the student to submit a video through Canvas, that will then be graded by the instructor.
Both teachers and students have access to Mymediasite. Students can prepare a video before they open the assignment from within Canvas.
Creating a video assignment is similar as creating a regular assignment. The group assignment and peer review also work in the same way. We have created a step-by-step instruction to help you with the assignment creation process. You can find the instruction in the Library Canvas Training course (for UM staff only, log-in required).
Need help?
Contact your Faculty video and Mediasite key-user to get help with Mediasite issues. You can find the contact details for each faculty in the table below:
FASoS | Paul Geurts | Ict-fasos@maastrichtuniversity.nl |
FSE | Video-FSE@maastrichtuniversity.nl | |
SBE | Walter Vluggen | Video-SBE@maastrichtuniversity.nl |
LAW | Richard Sieders Marc Weerts |
Video-LAW@maastrichtuniversity.nl |
FHML | Bas Kitzen Bram van Emmerik |
Video-FHML@maastrichtuniversity.nl |
FPN | Werner Teeling | Video-FPN@maastrichtuniversity.nl |
UM Videoteam | Manager: Annabel Reker General info: |
Annabel.reker@maastrichuniversity.nl videoteam@maastrichtuniversity.nl |